


An ISO file (often called an ISO Image) is a disc image file with all the files & folders found on an optical disc. However, ISO files are not useful until you write or burn them to a USB drive or disc.
So, if you want to transfer large files or programs over the web, an ISO file can undoubtedly assist you with that. It is because the ISO file can contain every single file needed for the program to run. For instance, you can download or purchase Windows 10 in ISO format, ready for mounting in a virtual machine or even extraction to a device.
Well, if you want to create, mount, or burn ISO image files for free, there are several solutions you can use, which I will discuss in this guide.
How To Easily Create ISO Files For Free On Windows 10
Windows do not have a native way of creating ISO image files for free, but you can use freeware tools to make the files. I will use the BurnAware Free program to create an ISO file on Windows 10 from a disc for this guide.
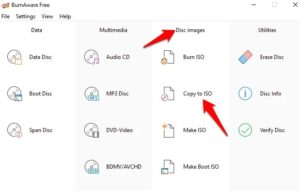
1. At first, download, install and run BurnAware Free. Under Disc Images, tap Copy to ISO.

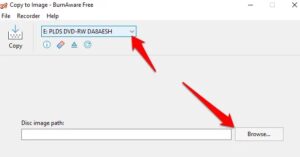
2. Choose the disc you want to use from the drop-down menu. Must ensure the disc is supported by your optical drive, then choose Browse.

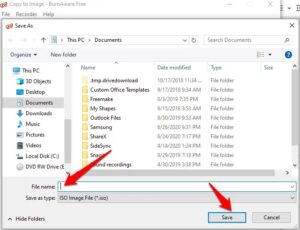
3. Now, give the file a name in the File name text box and select a location to save the file. Tap Save.

4. Insert the disc you choose, then choose Copy.
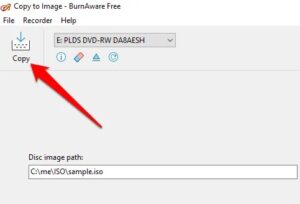

5. Now, wait until the ISO file is created from the disc. The Copy process completed message successfully will appear when the file is created.
The ISO file now will be saved in the location you chose with the file name you entered. Close the Copy to Image window, then eject the disc you were using from the drive.
How To Easily Create ISO Files For Free On MacOS
If you’ve a Mac computer, you can use Disk Utility & other included tools to create an ISO image file quickly.
How to Create An ISO Image File With Disk Utility
With Disk Utility, you can efficiently create an ISO file in these simple ways:
Create a secure disc image
Create an ISO file for storage
Create an ISO file from a disc, folder, or a connected device
Create ISO files for storage By using Disk Utility:
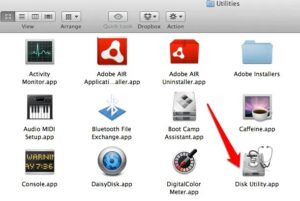
1. Tap Menu > Apps > Utilities > Disk Utility.

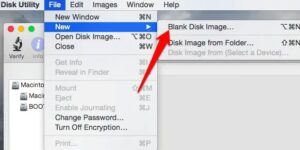
2. Select File > New Image > Blank Image.

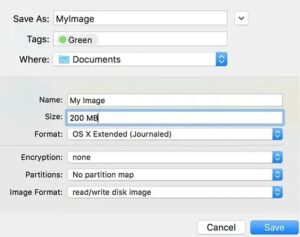
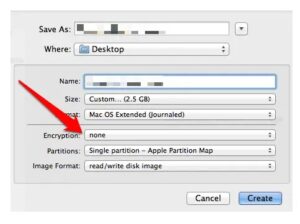
3. Name the new file, add tags, then select a location to save it to. You can even change the format & size for the disc image but leave encryption settings as disabled. Choose an option from the Image Format menu: Sparse bundle disc image, sparse disc image, DVD/CD master, or read/write the image.

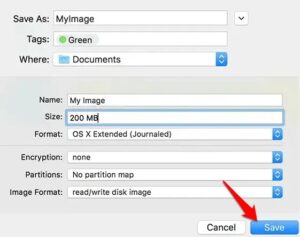
4. Tap Save to create the image file, then tap Done.
Disk Utility will now create the ISO image file where you saved it. You can mount the ISO image file here.
Additionally, you can use Disk Utility to create an ISO image file for free from a disc.
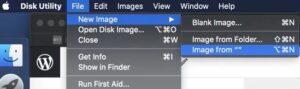
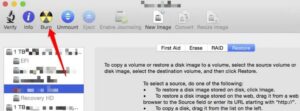
1. Open Disk Utility, then choose a volume, disc, or the connected device. Tap File > New Image and then choose Image from (your device name). In case the device has no name, it will show up as “”.
2. Now, enter a name for the file, add tags where essential, and then select a location to save it. Tap Save and click Done.

Note: Once creating an ISO file from a disc, ensure the disc is not corrupted or damaged as the resulting ISO file will not be a reliable backup.
Note: You can create an ISO file containing a folder or a connected device. To do so, open Disk Utility, then tap File > New Image > Image from Folder. Choose the folder from the dialogue and tap Open. Please enter a name for the ISO file, add the essential tags, then choose a location to save it. Tap Save > Done.
If you’ve confidential documents, you can create a secure ISO file then put the documents in an encrypted ISO image file.
1. Open Disk Utility, choose File > New Image > Blank Image.
![]()

2. Give the ISO file a name, also add tags where essential, and select a location to save the file. Tap the encryption menu and choose an encryption option.
3. Enter a password, then re-enter to confirm the password. Please make sure you do not forget this password as you’ll use it to unlock the ISO file, then click Choose.

4. Tap Save > Done. Go to Finder, then copy the confidential documents you need to protect to the ISO image file.
How To Mount An ISO Image File
Well, mounting an ISO image file “tricks” your PC into thinking that the file is an actual disc. For instance, if you are playing a video game that needs its original disc, you can create & mount the ISO image file of that disc to play the game instead of inserting the physical disc.
Moreover, windows will create a virtual drive for the file when you mount an ISO image file the same way a drive is made for a physical disc. In this way, you can play a video game, install an app, listen to music or enjoy a movie from the ISO file without burning any data to a physical disc.
How To Quickly Mount An ISO Image File On MacOS And Windows 10
You can efficiently mount an ISO image file natively by double-tapping on the ISO image file.
You can even use the File Explorer app to mount an ISO image file on Windows 10.
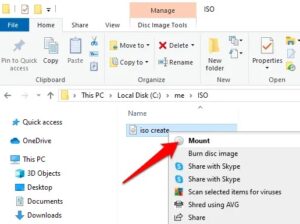
1. Firstly, open File Explorer and choose the ISO image file you wish to mount. Tap the Disc Image Tools tab. The Disc Image Tools tab merely appears when you select the ISO image file.


2. Click Mount on the upper left side. Windows will instantly create, then open the contents of the ISO image file.
3. Now in the left pane of the File Explorer window, tap This PC, and you will see the virtual drive pop-up alongside other drives on your PC’s system. You can now copy files from the ISO image file to your hard drive & do whatever you wish with the files.

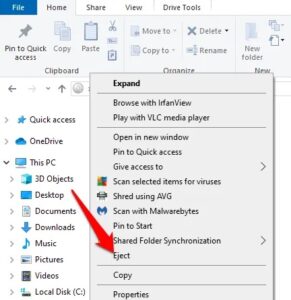
4. So, to unmount the ISO image file in Windows, right-tap on the virtual drive in File Explorer and tap Eject.

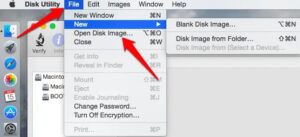
And to mount an ISO image file on your Mac computer, simply double-click on the file. You can even mount an ISO image file on macOS by opening up Disk Utility & going to File > Open Disk Image, or even opening up a Terminal window & typing hdiutil mount filename.iso.

How to Easily Burn The ISO Image File To Disc On Windows 10
Once you burn an ISO file to a disc, you can duplicate the original disc, including the copyright protections, files, and even other settings.
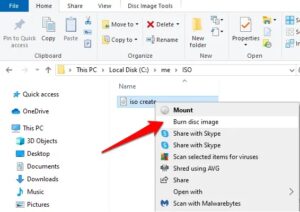
1. At first, insert a blank disc in your computer’s optical drive. Right-tap on the ISO image file and tap the Burn disc image.

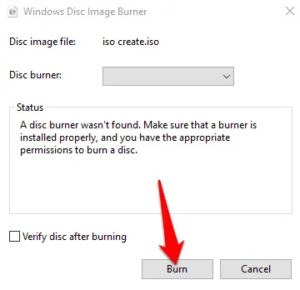
2. Now confirm that the ISO was burned without errors by tapping “Verify disc after burning.”
3. Tap Burn.

Burn An ISO Image To Disc On MacOS
There are 3 different ways to burn an ISO image file just for free on macOS:
Finder app
Disk Utility
A Command-Line or hdiutil in Terminal
Burn An ISO Image Using Finder App
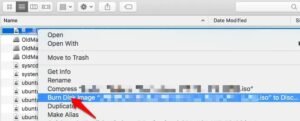
1. Open Finder, then look for the ISO file. Tap once to choose the file, and then click File > Burn Disk Image (filename) to disc option. You can even right-click the ISO file and choose Burn Disk Image.

2. Afterward, insert a blank disc into the drive and tap Burn to start burning the ISO file to the disc now.
Burn An ISO Image To Disc By Using Disk Utility
1. Tap Apps > Utilities > Disk Utility to open the utility.
2. Tap File > Open Disk Image. You will see the available drives listed by name in the left pane.


3. After that, insert a blank disc into the Mac drive. Tap Action > Open Disk Utility > OK.
4. In the Disk Utility (Super Drive) window, now drag the ISO (.iso or .dmg) file from a Finder window or your desktop into the Disk Utility window. Afterward, drop the file in an empty area in the left pane below Mac drive names.
5. Choose the ISO file in the left pane and tap Burn on the upper left side.

6. The Burn Disc In: the window will display the destination for the file, i.e. the blank disc. Tap Burn.
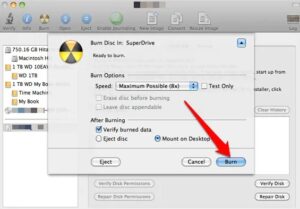

7. When the burning process complete, the disc will be automatically ejected from the drive. You will also receive a message; the ISO image was burned successfully. Tap OK to exit.
Burn An ISO Image To Disc By Using Terminal
1. Simply move your ISO image file to the desktop or any other location that’s effortless for you to find, then insert a blank disc into the Mac drive.
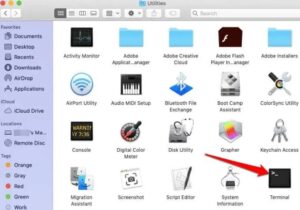
2. Open Terminal from Finder by tapping Apps > Utilities, and then double-tap Terminal. You can also tap the Launchpad icon in the Dock, then enter Terminal in the search bar.

3. Type the command: hdiutil burn ~/PathToYourISOFilename.iso. The ISO image file will begin burning onto the disc you inserted. Tap Return.
How To Extract An ISO Image File
You can extract your ISO image file’s contents to a folder if you do not need to burn the file to a disc or any other storage device.
Extracting the ISO file will now copy all its contents straight to the folder, then you can watch the contents the same way you would with any other folder on your PC. However, you cannot burn the folder straight to a device.
A free unzip program like 7-Zip can assist you to extract the ISO file to a folder. Right-tap on the ISO file, choose 7-Zip > Extract to “\.”
Efficiently Work With ISO Image Files
I sincerely hope you know how to create, mount, and burn ISO image files for free using native or third-party tools. If you could follow these simple steps & successfully create, mounted and burning ISO image files, share them with us in a comment.